Pages

Sunday, November 18, 2012

Landmark Jakarta Stamp (Katedral Curch) - Illustrator

                  The title of this post is my project :} yeah, my Digital Design project is make a stamp with landmark Jakarta as a picture. I have some options, such as : Bunderan HI, Gereja Katedral Jakarta, Patung Pancoran, Gereja Emmanuel, Gedung DPR, and Gelorang Bung Karno. But i can't choose MONAS, that is forbidden landmark HAHA. Sir Em forbid us to use MONAS picture, he said MONAs is too easy. Honestly i don't know what will i do with this project :B
                   Finally i chose Katedral Church Jakarta as my picture of stamp Project. I made a moodboard that describe Katedral from the main entrance till inside the Church :)

After i send the moldboard to Sir Em, he ask me to start "Tracing". Then, i chose 1 pic
ture. that is the largest size, so when i zoom it in the picture didn't pixelated.
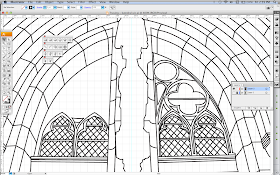
I started trace my Katedral, but i understand why sir Em Monas is too easy, and Katedral is so hard :( when my friend use Monas, she is coloring when I'm in the middle of Katedral tracing.
In the process, there are 3 hardest parts for me. the first glass over the door because it's so detail.
the other hardest part is black metal on the door! :( It's like curly-curly @_@
And the last is the top of this building :|
BUT AT THE END, I TRACED THEM ALL! YEAH! ;)
Little bit confused about the sentence above the door, and I get the information here :)
I don't have that font in my laptop, i have tried one by one font :( But i just put one font to fill it and will ask sir Em soon :B In this project, i just used some tools for tracing.
AND THIS IS MY KATEDRAL! :DDDD
time to coloring! and little bit hard because some line are not connected each other :{ But finally i finished it by add price and name. Printed + polifom + cover sheet = SUMBIT TO SIR EM! :D
Have a nice day!
-JAJ-

Friday, November 16, 2012

Handmade Book, Tape Binding (Hard Cover & Soft Cover)

Hello guys! Today i want to share about my experience make my own book with hard cover and soft cover.
First, you need to prepare all materials and tools.
+++ Materials :
1. A4 Paper 200 sheets *
2. Duplex
3. Wrapping paper *
4. Book Cloth *
5. A4 paper 1 sheet **
* You can choose your own style/colour :)
** i suggest you to choose a paper that matches with wrapping paper/book cloth
+++ Tools :
1. Cutting mat
2. Cutter
3. Scissors
4. Glue (PVA glue is better)
5. Brush for glue
6. Awl
7. Pencil
8. Thread
9. Ribbons
10. Metal Ruler
11. Needles
After you prepared all needed things, LET'S START! :DD
STEP 1 : Fold 5 sheets A4 paper into 2 parts (like A5 paper). 5 sheets = 1 signature. Do it to all papers. So, you have 20 signatures for hard cover and 20 signatures for soft cover.
STEP 2 : Make 4 hole in the folding line with AWL. first hole is 1,5cm from the edge. second hole is 6cm from first hole. third hole is 6cm from second hole. the forth hole is 6 cm from third hole and make sure 1,5 cm from edge.
STEP 3 : prepare your thread and needles. and start sewing like this :
STEP 4 : Do it to 20 signatures, from right to left, and be BABABABABABABABABABA Signature in 1 book (hard cover / soft cover)
STEP 5 : Stick the ribbon to binder to make them tidy and tight.


Saturday, November 10, 2012

Typeface

Hello! This is my first post, yeah! last week i learn about Typography and i have project to make a typeface drawing. first i sketch my friend's face named Yasmin. Then i put so many words that describe her.


After i sketch the face and words, yesterday i was finishing the sketch with drawing pen, and don't forget to bring my "Boba Inc Hazelnut Smooties Milk Pudding" to brighten my day, yeah!


And Finally, this is me and my Typeface drawing!


I hope my typeface can inspiring you, and sorry if there is some mistakes in my words :p Happy weekend! 

 - JAJ -